

TRON is gaining popularity and a lot of new decentralized apps (Dapps) are built on the TRON network recently. One of the main reasons many developers switched over to TRON is because TRON’s underlying architecture made it more cost-efficient for developers to deploy Dapps on the TRON network. The developers also won’t need to worry too much about the blockchain network speed because of TRON’s scalability. It is possible for TRON network to scale up indefinitely with sidechains. If you have heard a lot about TRON. know its potential in the blockchain field but don’t know where to start, follow our absolute beginner’s guide to start using TRON today.
What’s TRON about?
TRON’s mission is to build a decentralized internet. The concept of a decentralized internet revolves around the use of distributed web technologies, protocols, and decentralized applications to make the internet fundamentally more [glossary_exclude]open[/glossary_exclude] and accessible. Since data on a decentralized network is not stored on one central platform, the user will have control over their own data and can freely choose who or which platform to share their data with.
In other words, the fundamental goal of what TRON tries to achieve is putting power and control of the internet back into the hands of its users, rather than in the hands of a few massive centralized corporations. This allows users themselves to self-govern the web.
TRON is striving to build an entire ecosystem of decentralization network by integrating and/or partnering with BitTorrent for decentralized file system, DLive for blockchain-based video streaming, WINk for dapps gaming platform, Steem for decentralized forum, JUST CDP for decentralized finance, Poloni Dex for decentralized exchange, and much more.
Get a new TRON address
To get started with TRON, you will need a TRON address, this served like a bank account where other people can send you tokens. The official token of TRON is Tronix, which is often referred to as TRX.
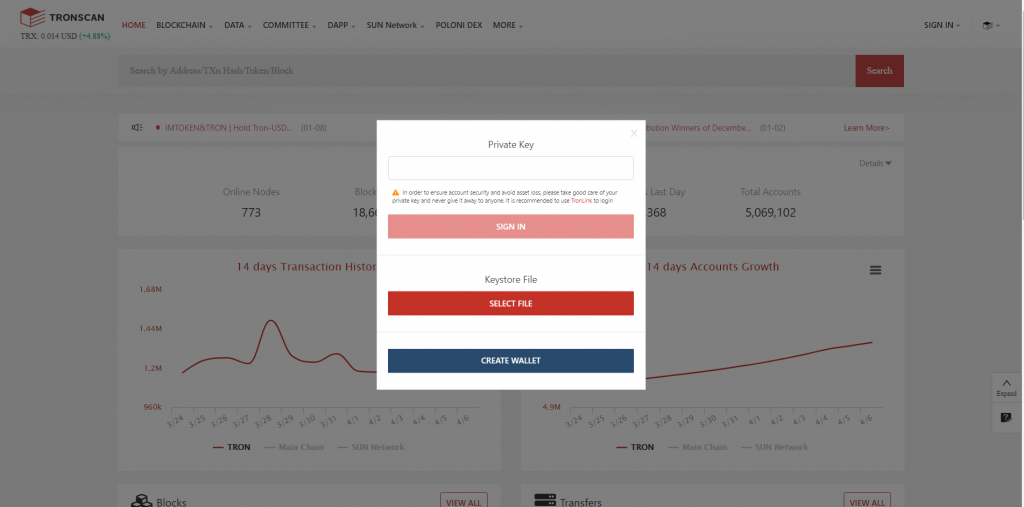
Head over to https://tronscan.org/ to generate a new TRON address. When the page is loaded, hover over SIGN IN towards the top right of the page and click on IMPORT A WALLET.

Click on CREATE WALLET on the pop up dialog.
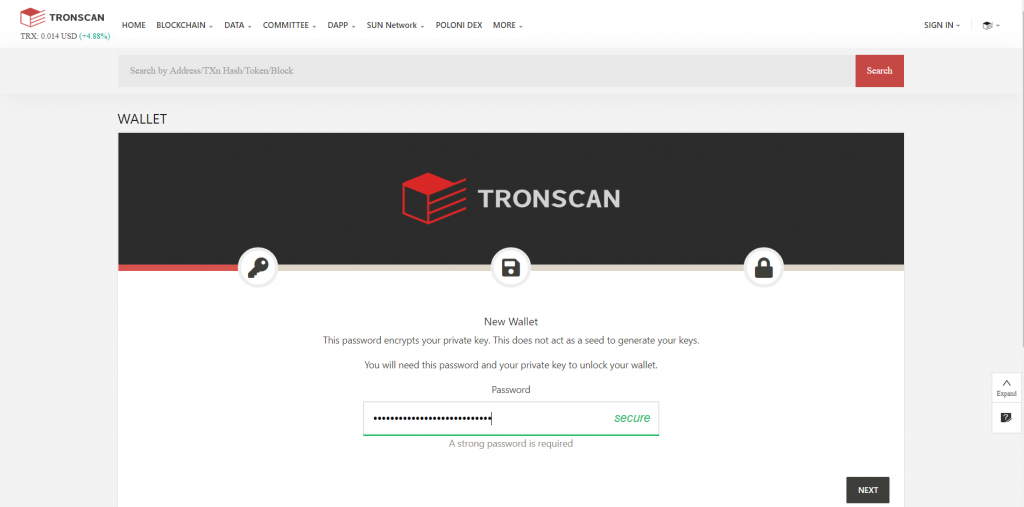
Set a hard-to-guess password and make sure you remember it because it is required to encrypt your private key later on. Do note that this password does not act as a source (seed) to generate your keys.
It is important for you to keep your password secure because this password is not uploaded and saved into any server. Therefore, there is no “forgot your password” feature here if you need to reset it at a later stage. This is a form of decentralization because hackers won’t be able to attack any central server to get users’ password because each user is responsible for his/her own password.
Once your password is set, click on NEXT.
Save your keystore file by clicking on the DOWNLOAD ENCRYPTED KEY button. You should not share this keystore file with anyone else otherwise you risk losing your fund in the account. Keep a backup of this file on another computer, portable device or offline storage device in case you lose the copy in your current device.
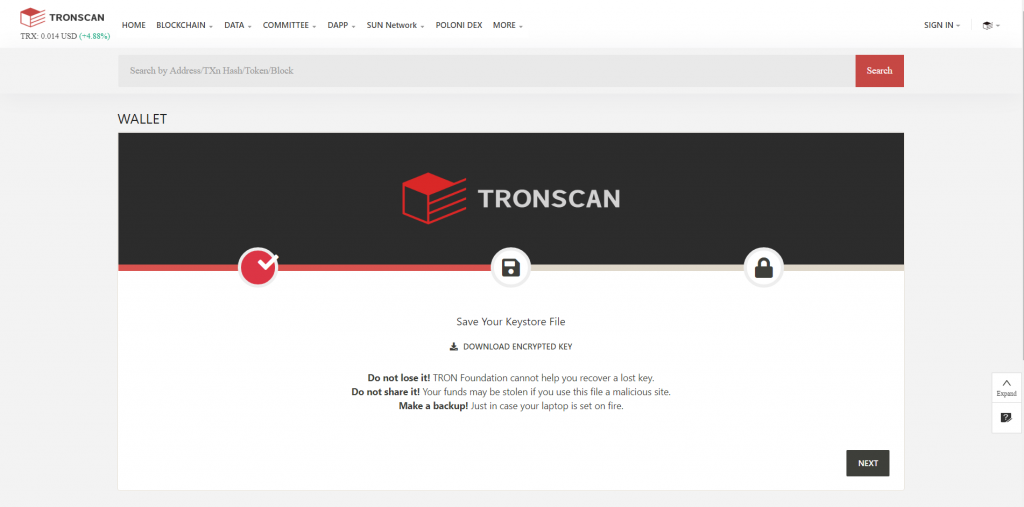
Your keystore file does not actually provide direct access to your account. In blockchain, your private key is the key to unlock your account. The keystore file actually encrypts your private key using the password you have provided in the previous step. Therefore, if you forgot your password, you won’t be able to decrypt your keystore file and will lose access to your account.
Click on NEXT when you have secured your keystore file.
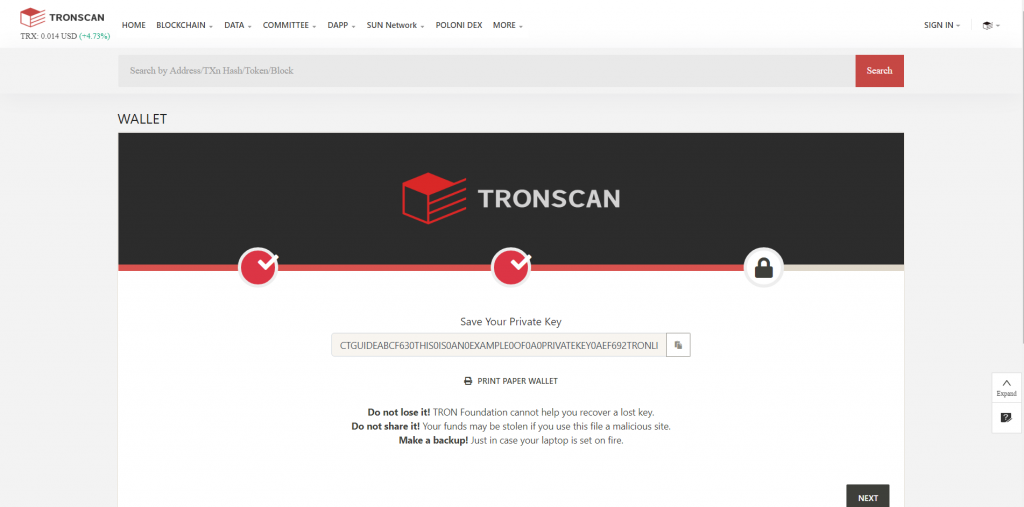
Click on the COPY icon to copy your private key to a save place. You should also lock your private key using software like WinZip or WinRAR if you have it.
As mentioned earlier, a private key will provide others with direct access to your account. The password you have set earlier is not required at all to access your account when a private key is used. Once your private key is exposed, your account is no longer safe as you won’t be able to change the private key since all crypto address consists of a private key that maps to one unique public key (public address).
Therefore, if you truly forgot the password you set for your keystore file, the last resort to access your account is through your private key. However, it is not recommended for you to use your private key to sign in unless required because if there is malicious software that can access your clipboard when you copy your private key, the malicious party will have access to your account anytime they want. Another risk with signing in with a private key is if there is someone who happens to take a photo or record a video while you are signing in, your private key may be exposed.
Click on NEXT when you have secured your private key to continue.
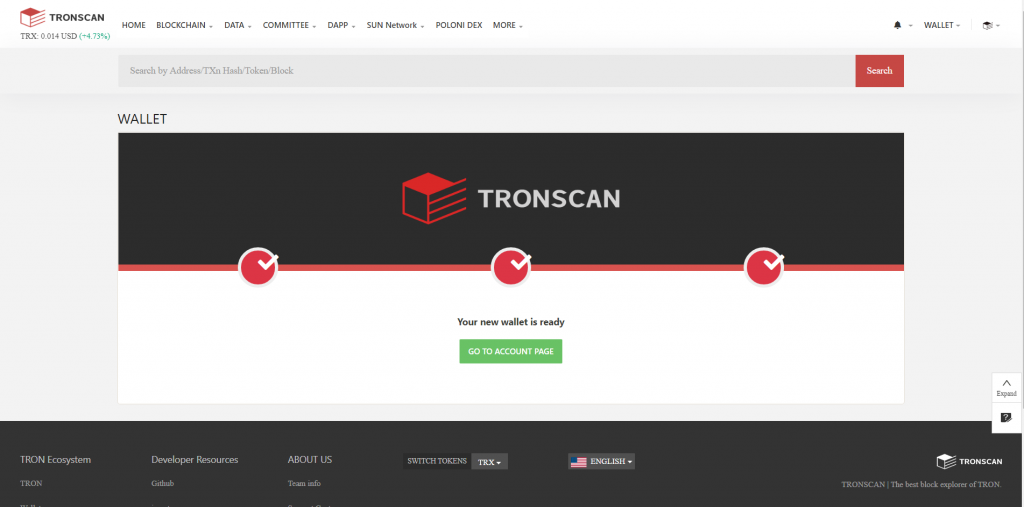
Congrats! Your TRON account is now ready. Click on GO TO ACCOUNT PAGE to access your account.
TRONSCAN account interface
The row that indicates Address is your TRON public address. All TRON address begins with ‘T’. In our example, our TRON address is:
TGuidexNBt9ZvLpeZ8Z24eF876A19AP9n7
Since this is a new account, you may notice that the bandwidth, energy, TRON power and available balance for this account are all 0. We will examine each of this indicator at a later stage.
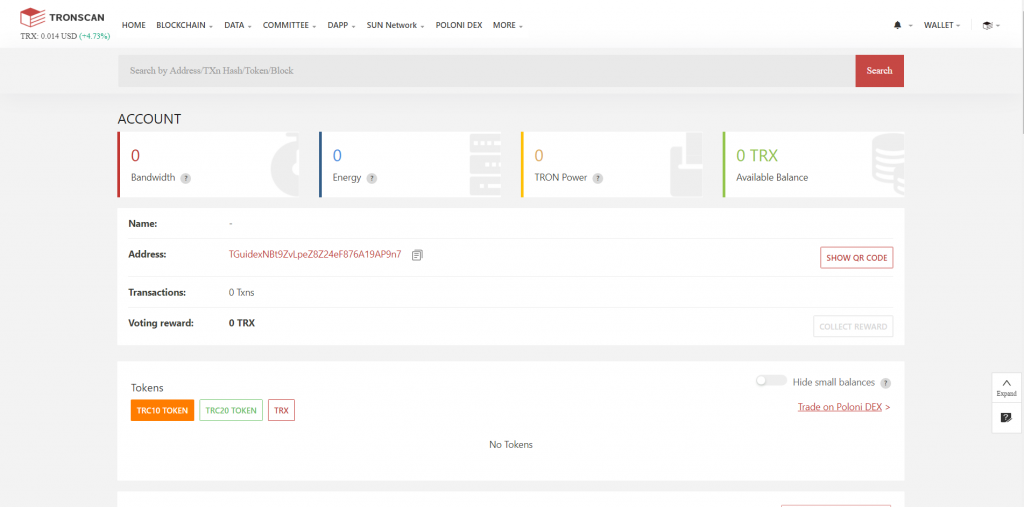
You may notice that there is a SHOW QR CODE button on the right of your address. This will show a QR code of your TRON address. This is our QR code, you may scan it with a compatible app to get our address.

It is useful to have your QR code handy if you want to receive fund from someone in real life as you do not need to have them manually type out your entire TRON address, or requiring you to copy and send your address to them. The sender simply needs to scan the QR code with a compatible app and it will show your full address.
Public key, public address and private key
Your public address is a hashed version of the public key. Since the public key is made up of an extremely [glossary_exclude]long[/glossary_exclude] string of characters, it is compressed to form the public address. In fact, your private key (an even longer string) generates your public key which, in turn, generates your public address. Therefore, TRONSCAN or other TRON wallets only need a private key to sign in, it won’t have to ask for your address because your public address can be derived from your private key. This functions differently in a non-blockchain world where an authentication usually requires a username and a password.
In the blockchain world, your address functions like a bank account number. Therefore, it is safe to pass your public address to someone who wishes to send you fund. However, unlike a bank account in real life, every public blockchain account is transparent. This means that given a TRON address, anyone can check the amount of fund there is in the account. It is by this nature of blockchain that transactions are always [glossary_exclude]open[/glossary_exclude], verifiable and can’t be counterfeit. In fact, you can see live transactions happening on the TRONSCAN Transfers page, you just won’t be able to associate who each account belongs to if it wasn’t publicized elsewhere.
Your private key, on the other hand, should be kept to yourself as it is the only info someone needs to access your account. We will now demonstrate how to sign in TRONSCAN with your keystore file and private key.
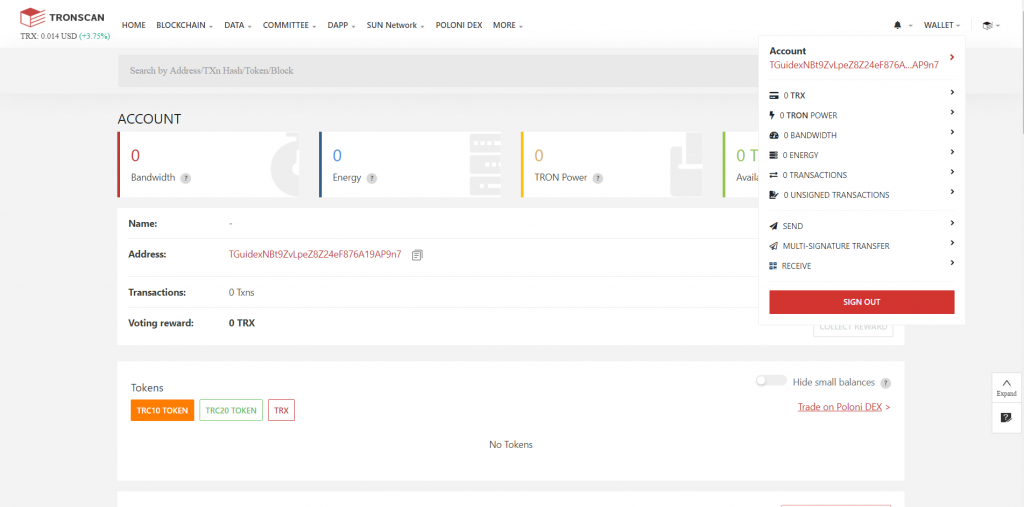
We first need to sign out TRONSCAN. Hover over WALLET towards the top right of the page and click on SIGN OUT.
Sign in TRONSCAN with a keystore file
On Tronscan.org, hover over SIGN IN towards the top right and click on IMPORT A WALLET.
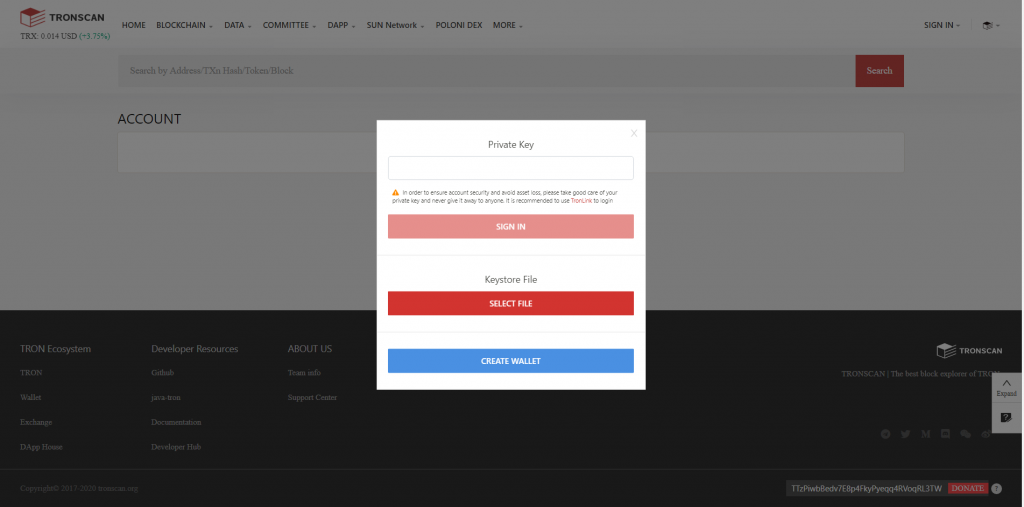
Click on SELECT FILE below the Keystore File section and select the keystore file you have saved earlier.
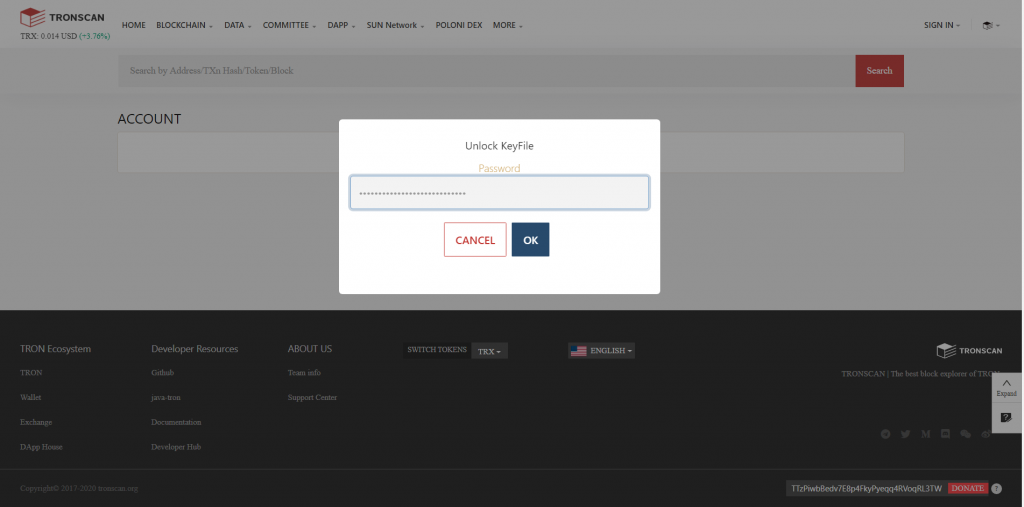
Enter the password you set earlier then click on OK to unlock your keystore file.
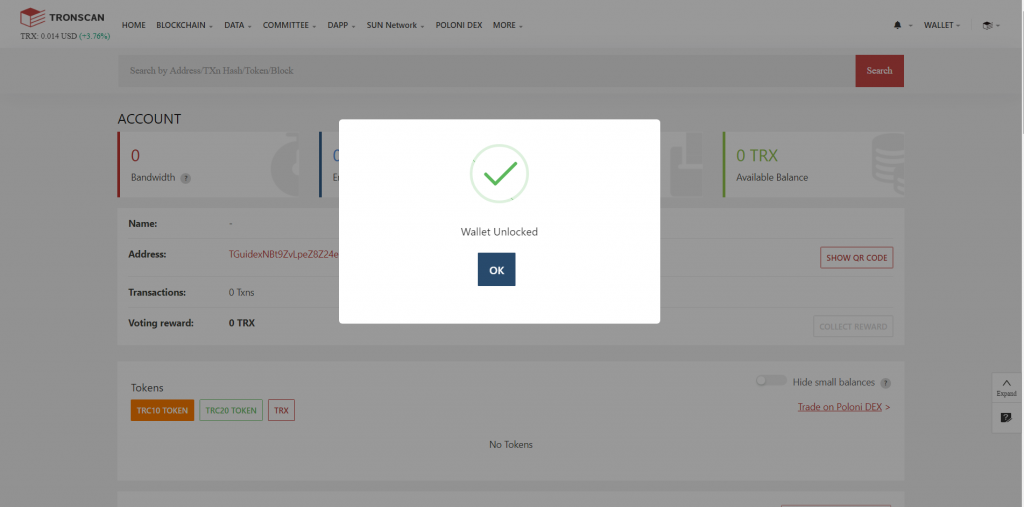
You will get a Wallet Unlocked status if you have successfully unlocked your wallet. Click OK to proceed to your account.
Sign in TRONSCAN with a private key
To sign in TRONSCAN with your private key, hover over SIGN IN towards the top right of the page and click on IMPORT A WALLET.
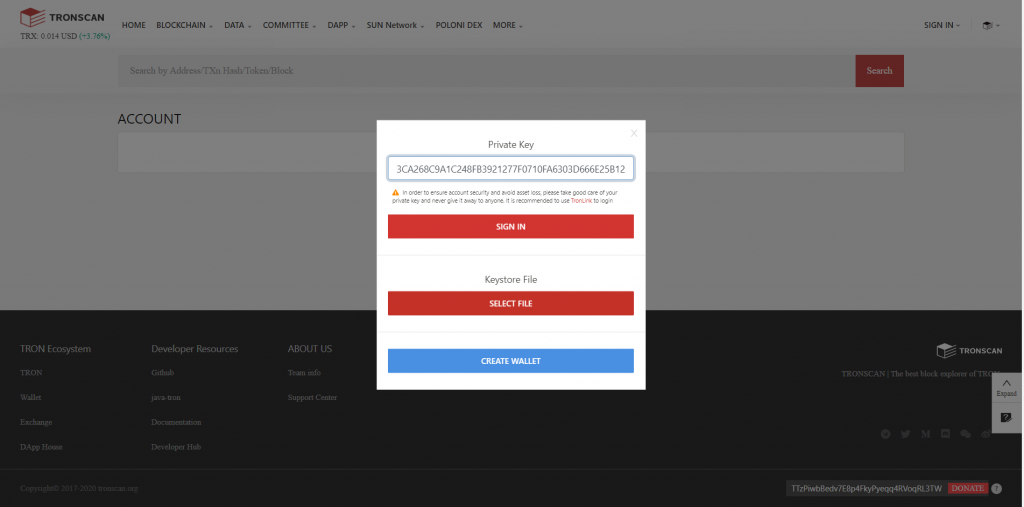
Paste your private key in the Private Key section then click on SIGN IN. Don’t worry, we are not using our actual private key here so our account credentials are not exposed.
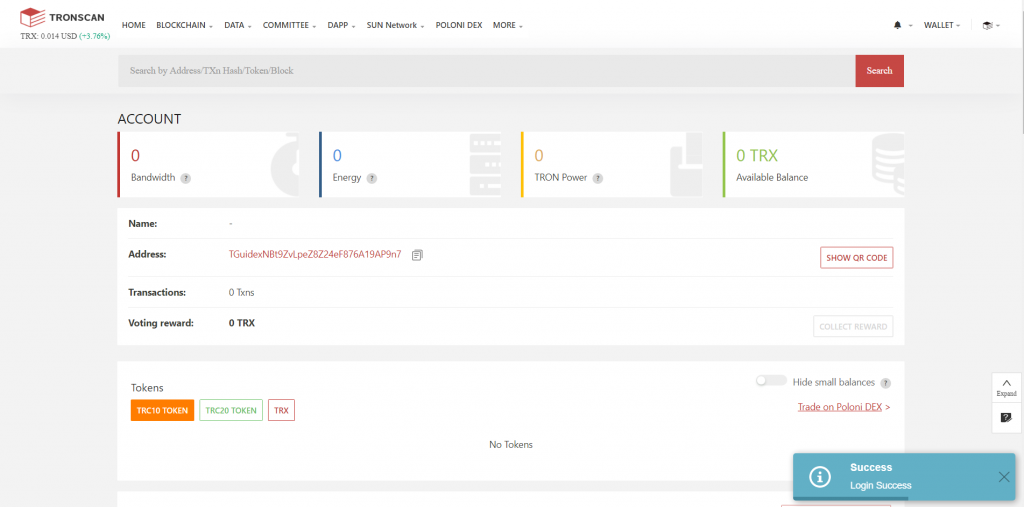
You should see a Login Success message towards the bottom right of the page once you are signed in.
That’s all there is for now. In the next tutorial, we will show how to perform basic functions on TRONSCAN such as sending and receiving transaction, using the block explorer, and introducing TRC10 and TRC20 tokens. If you know someone who wants to try out blockchain but doesn’t know where to start, direct them to Tron.Guide as we will prepare a series of easy-to-follow guides soon!

